A few weeks ago we did these quick and easy, little, paper pumpkins as a free craft in our store. We got a great response, but I know that a lot of our Instagram followers wished they could have been there. I figured- why not do a little tutorial so you all can make them at home? I know, Halloween is this weekend- but this is such an awesome craft for any fall decor (would be so cute in a cluster for a Thanksgiving centerpiece!) Plus they only take a few minutes- so why not?
This is an easy craft for kids or adults! I would love to see it done with patterned paper or as a garland (WOULD BE SOOO CUTE) but whatever you do- tag us @paperieandpen #radpaperhowto so we can see!
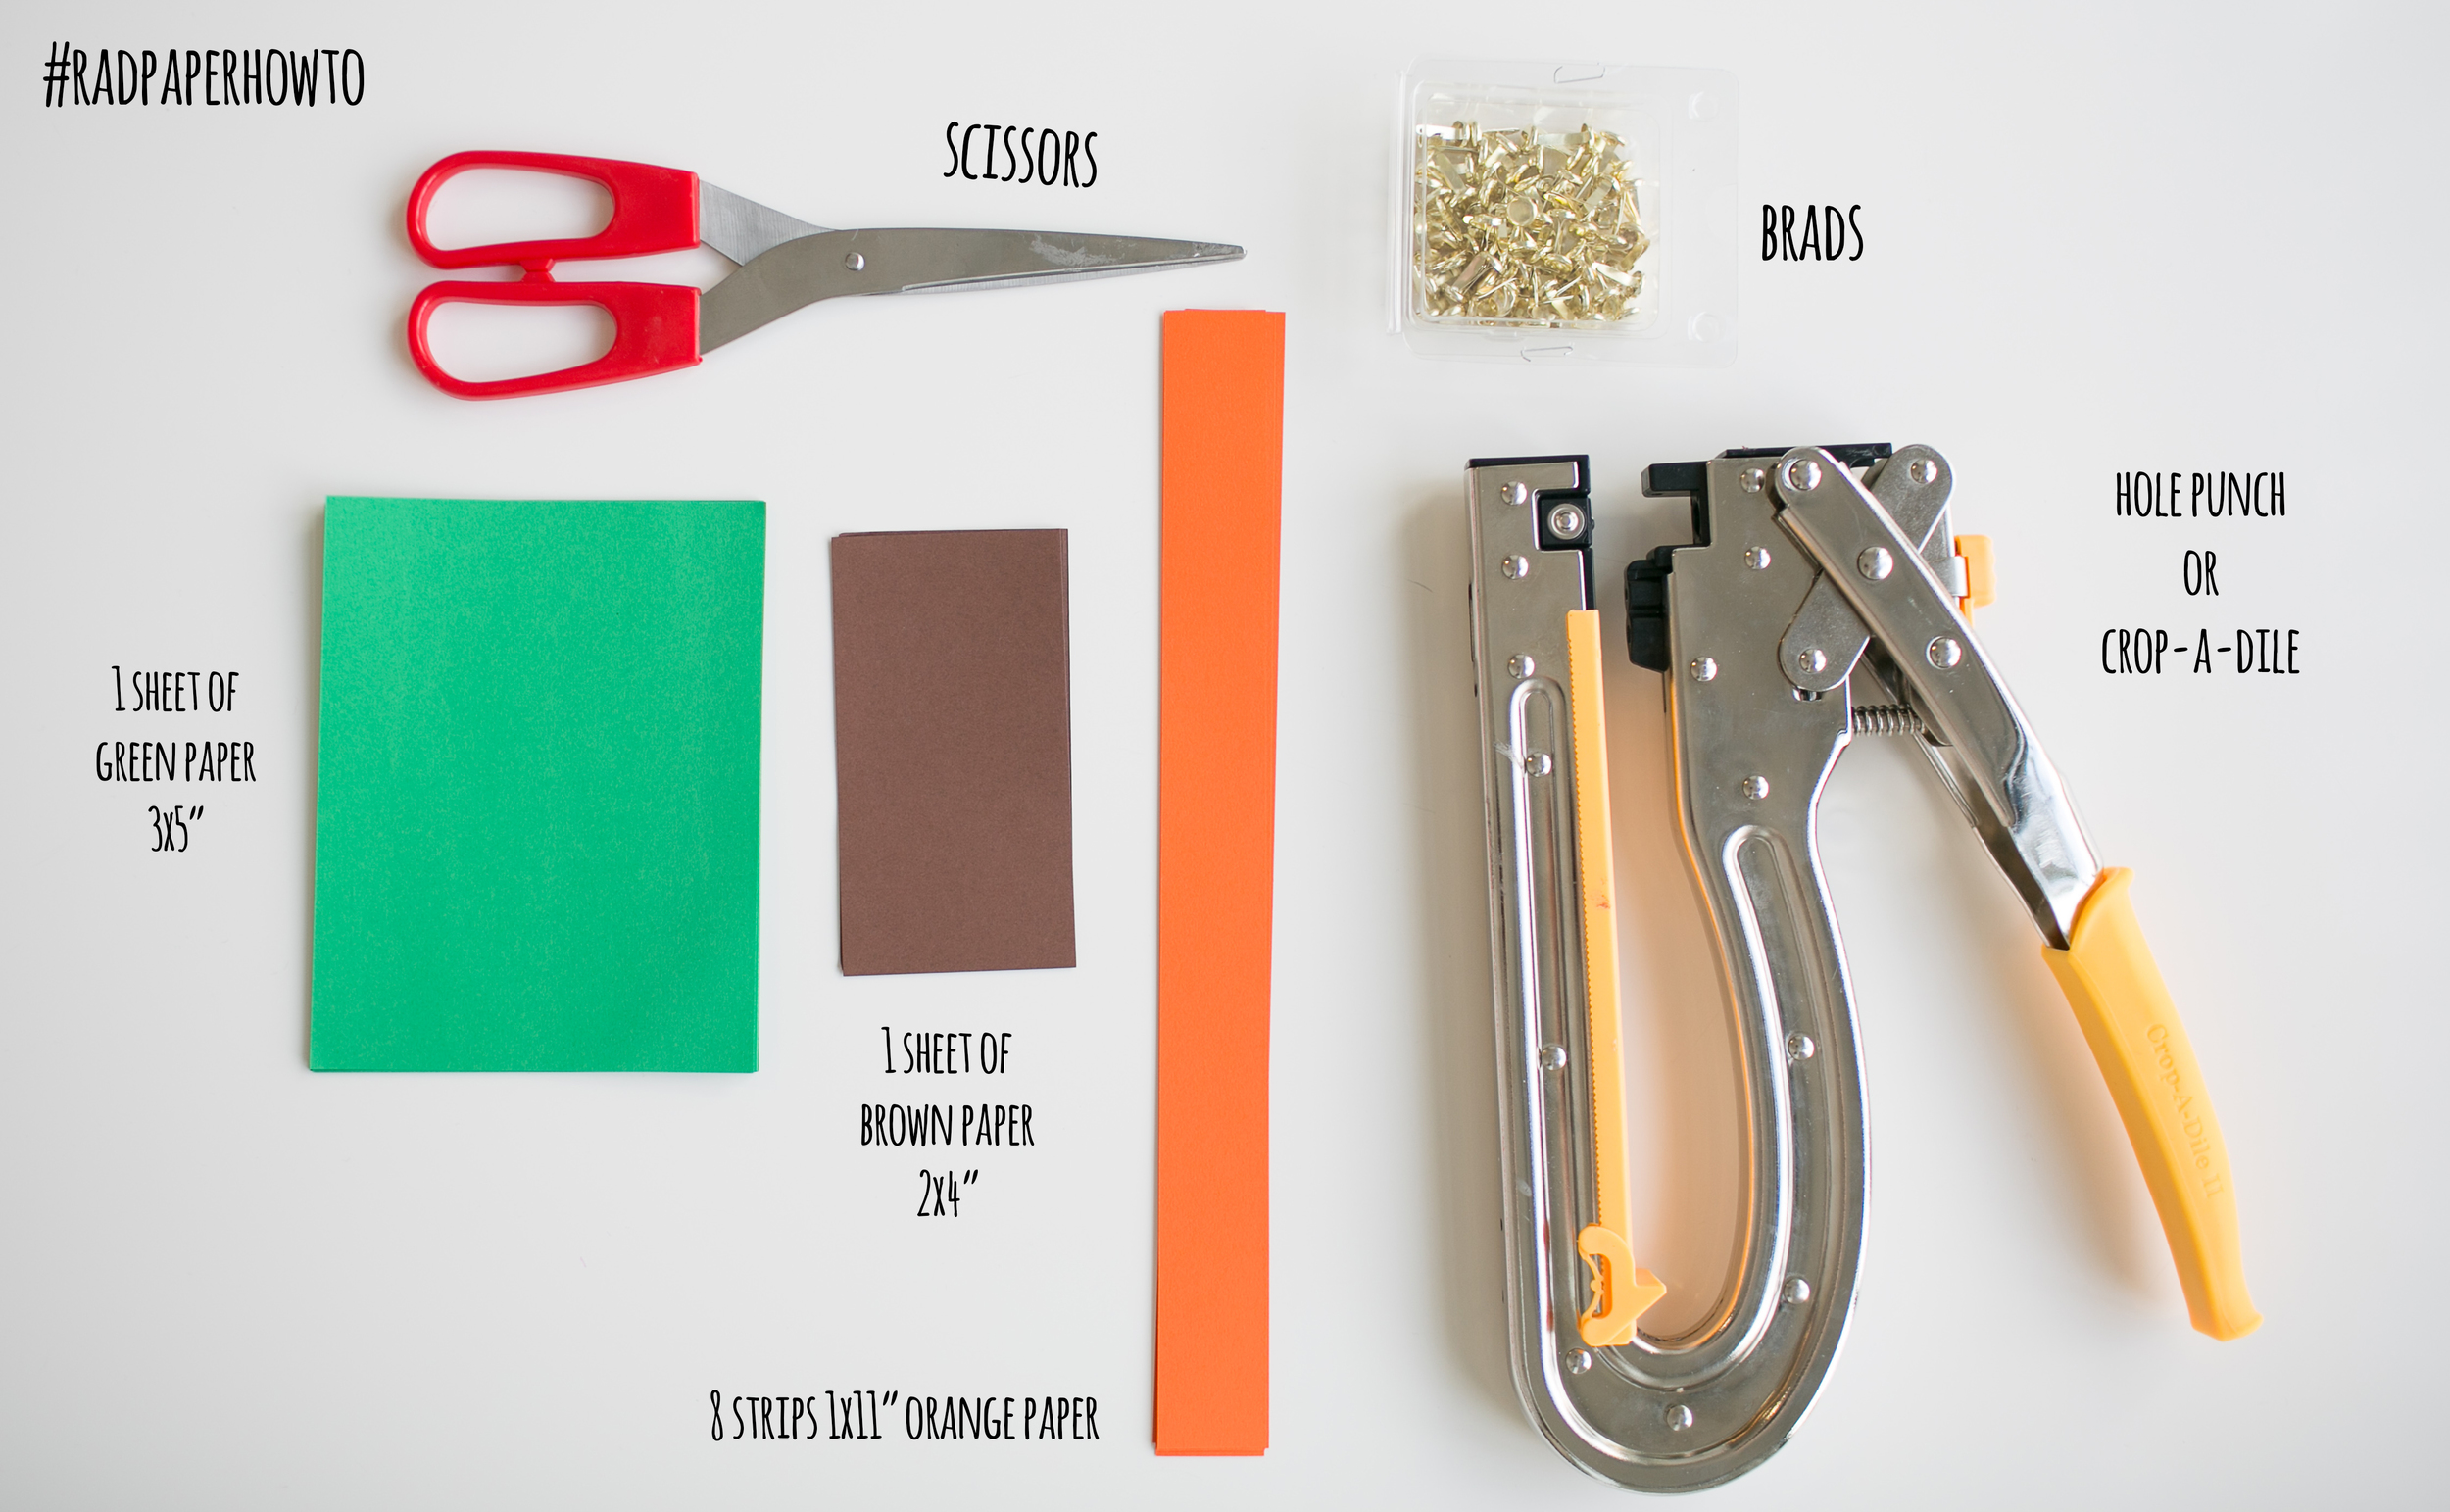
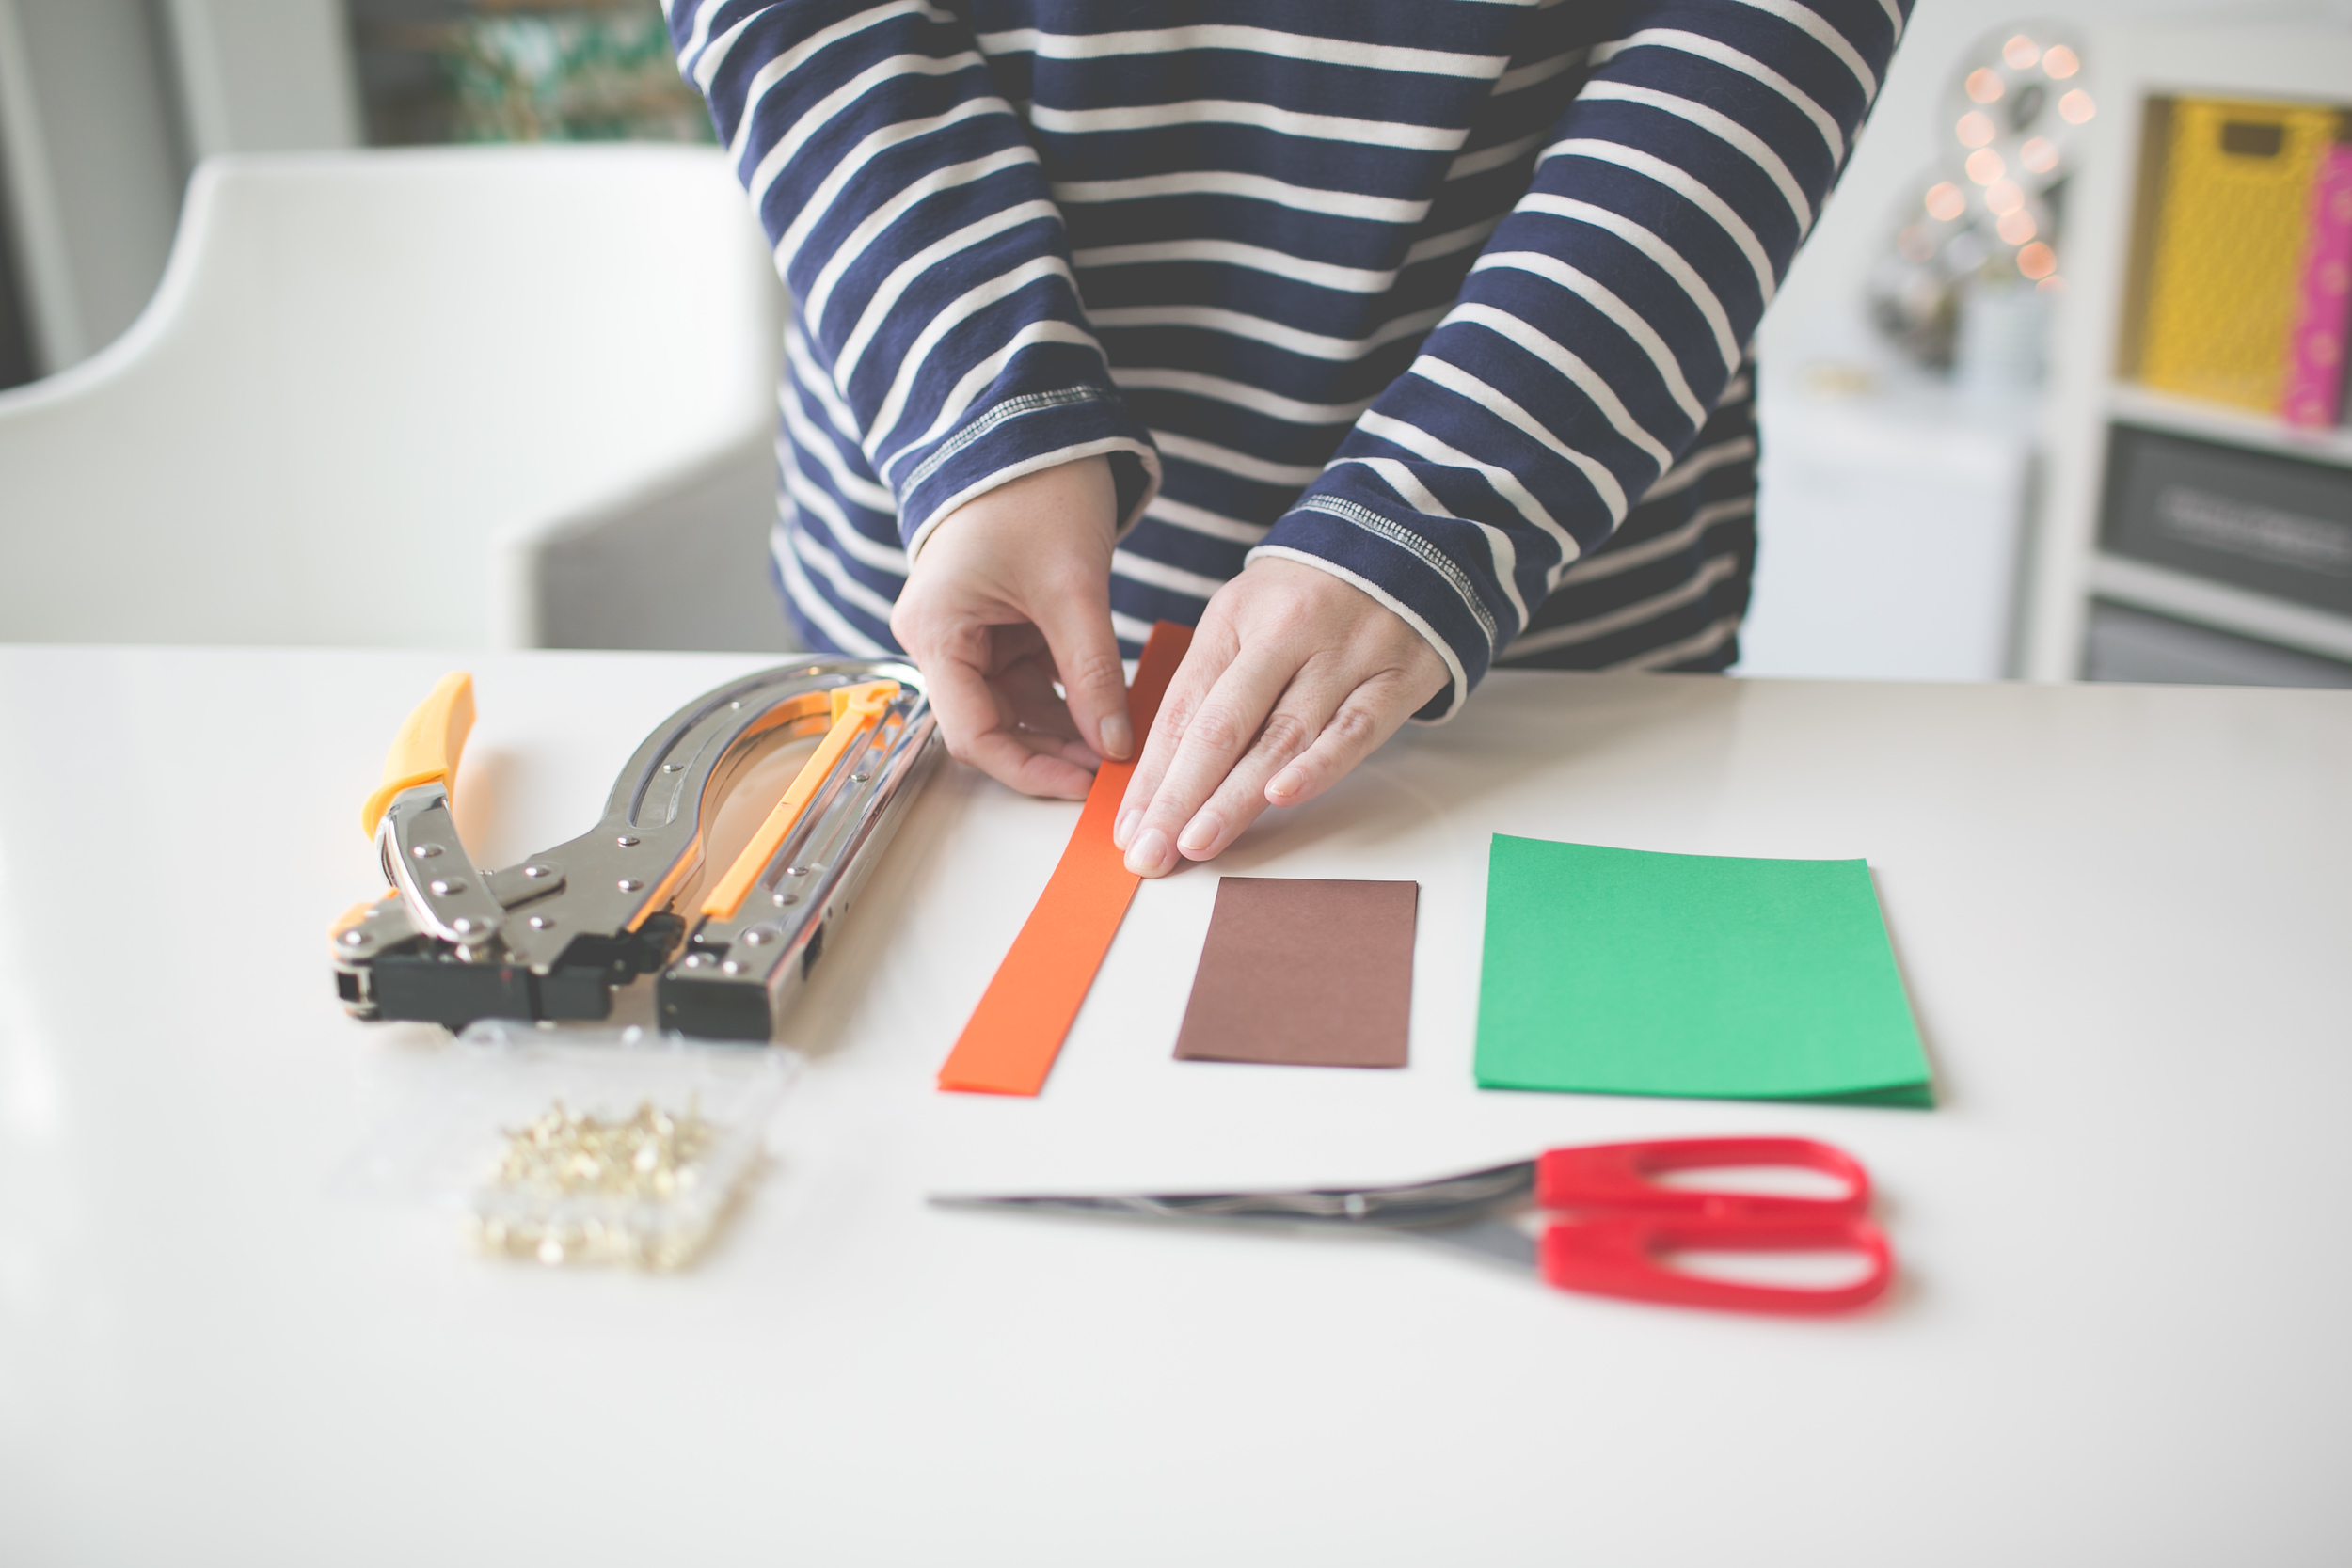
The supplies are pretty simple and straight forward. The best paper would be a text weight (thin) paper like from an office copy machine. I think it would also work well to use wrapping paper or a non-cardstock scrapbook paper. If you would like to make a larger pumpkin, you can make the strips longer and use more of them.
A normal hold punch works fine, just make sure you are punching the holes in the same place. But if you do a lot of hole-punching, a Crop-a-dile will be the best thing that has ever happened to you...since you can punch through a whole stack at once!
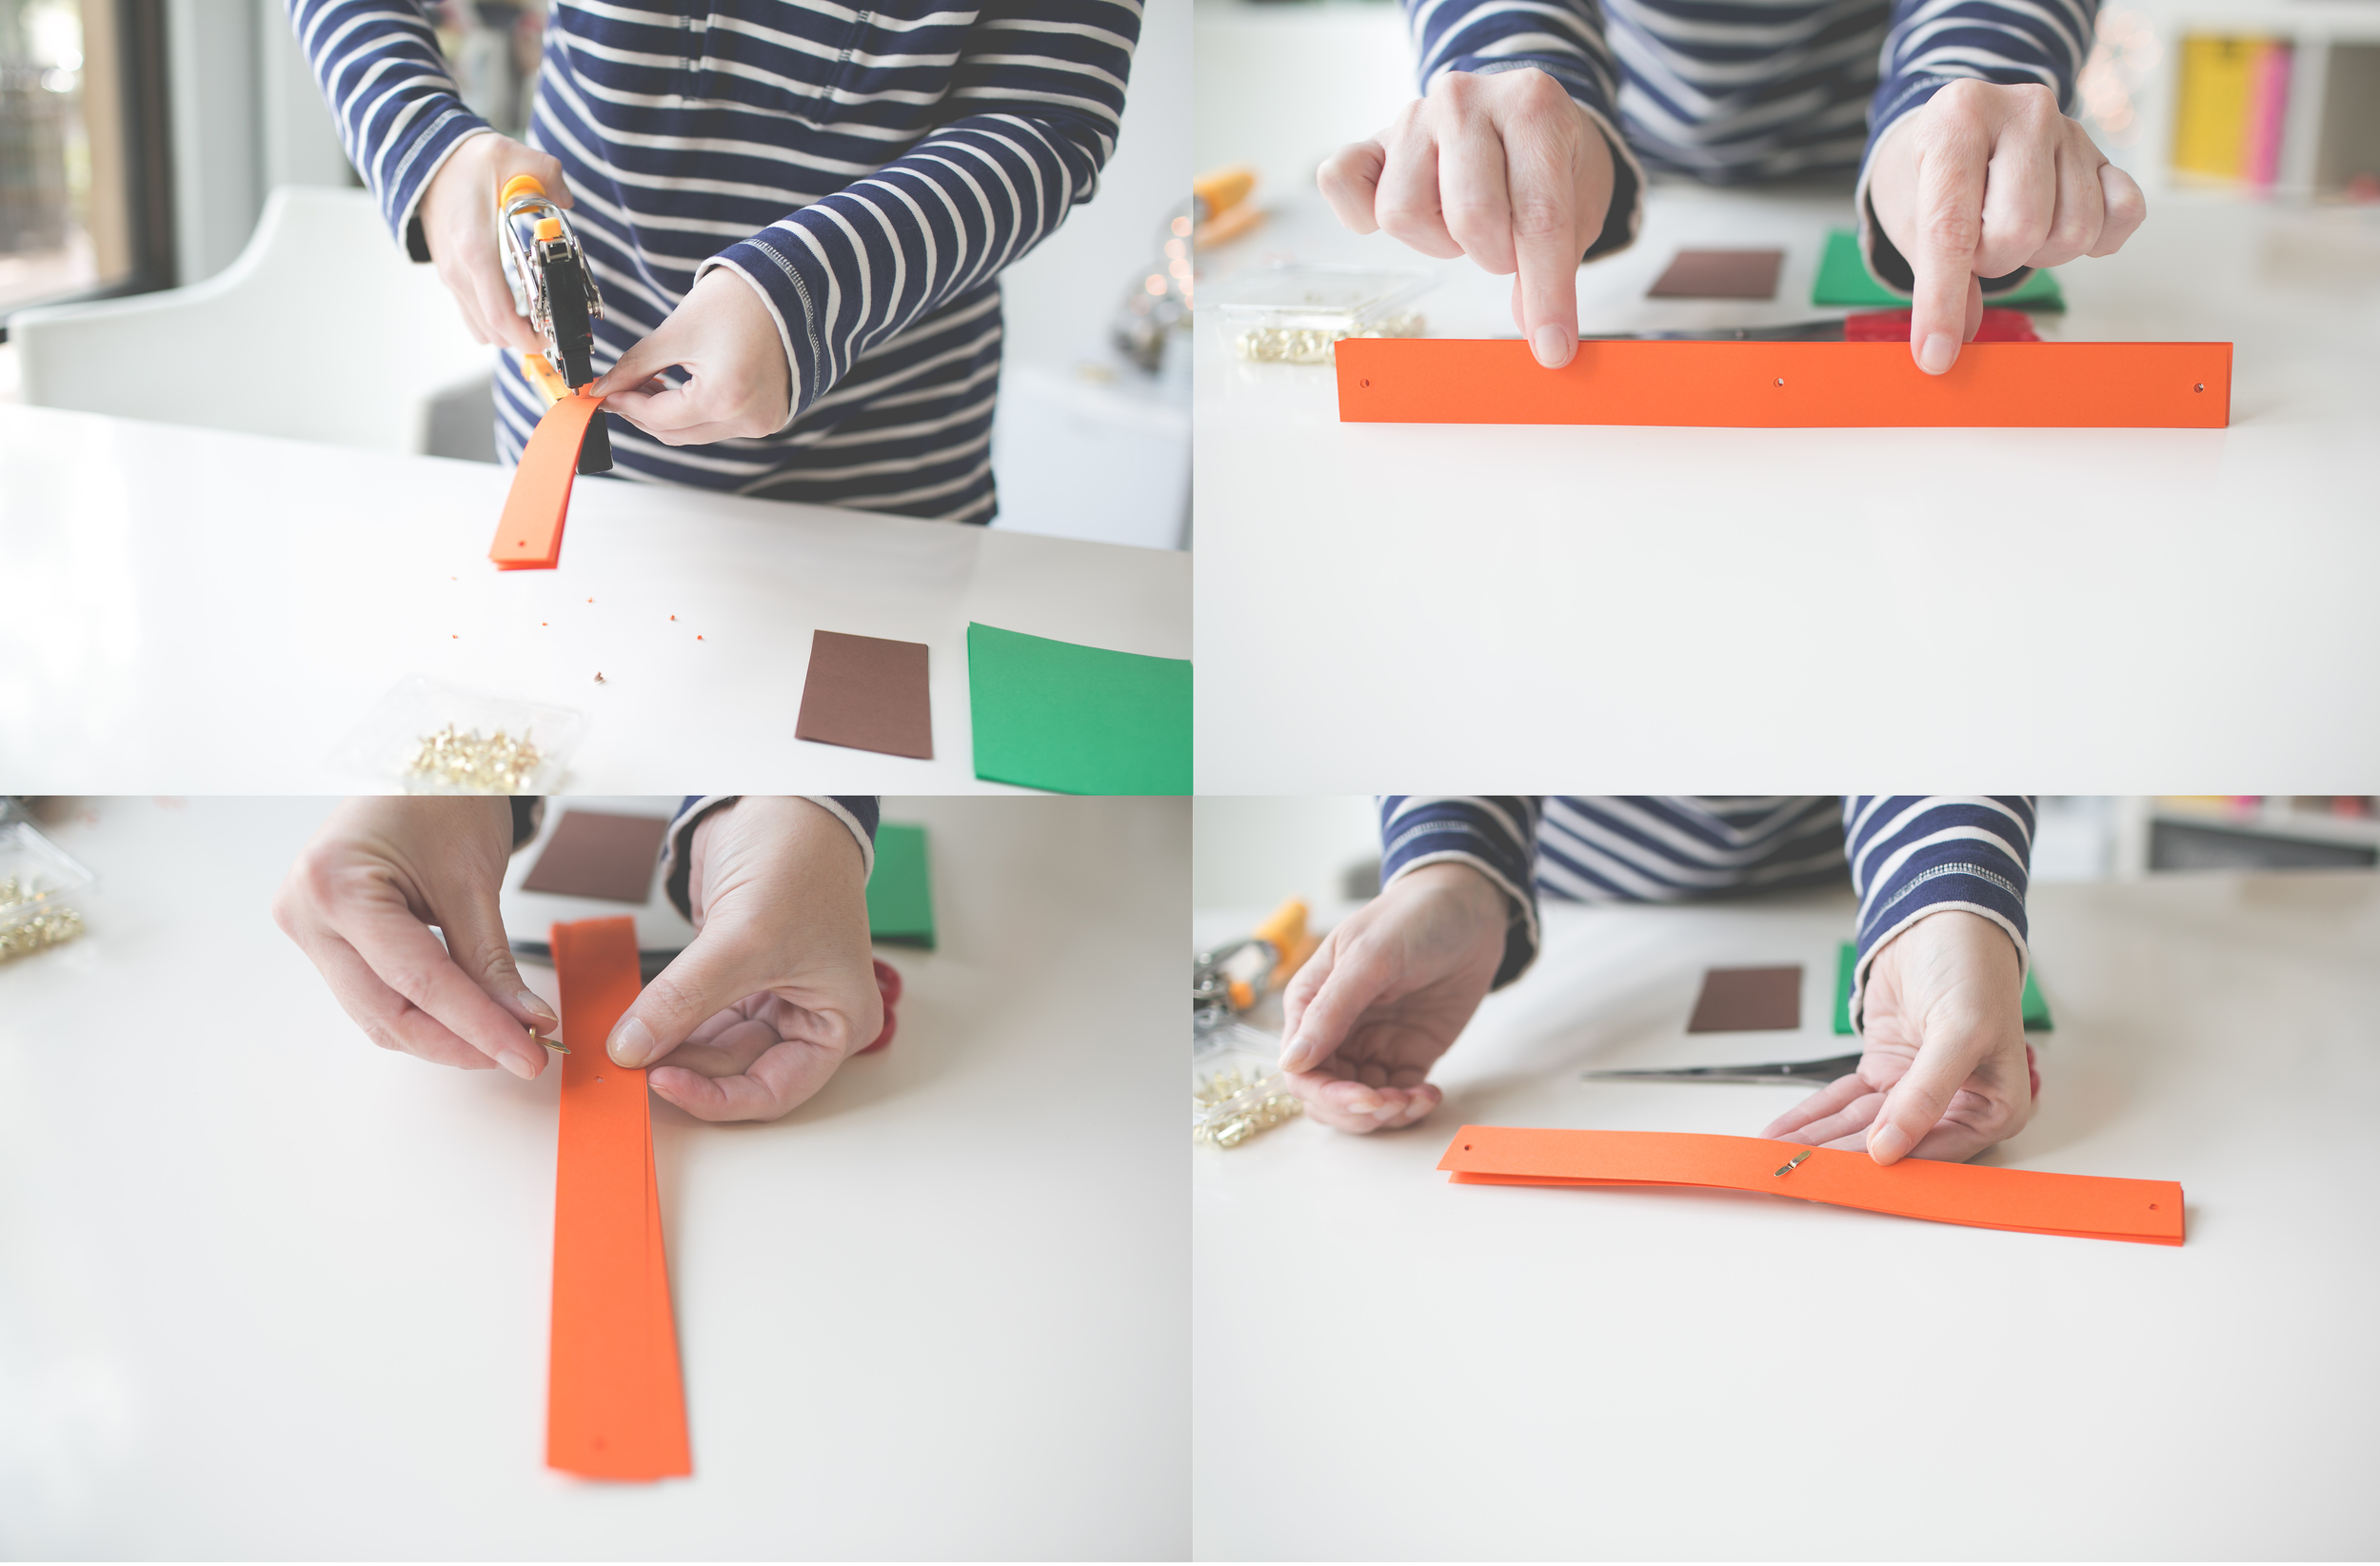
Punch 2 equal holes in your paper strips- one on each end, and one in the center. You will then assemble a brad in the center hole and fan out your strips into an equal circle.

Take another brad (point side up) and start gathering the ends of the strips one by one until you for a nice spherical shape. It works best if you alternate strips that are across from each other. When you have collected all of the ends, loosely open the brad to keep it all together while you cut your leaves.
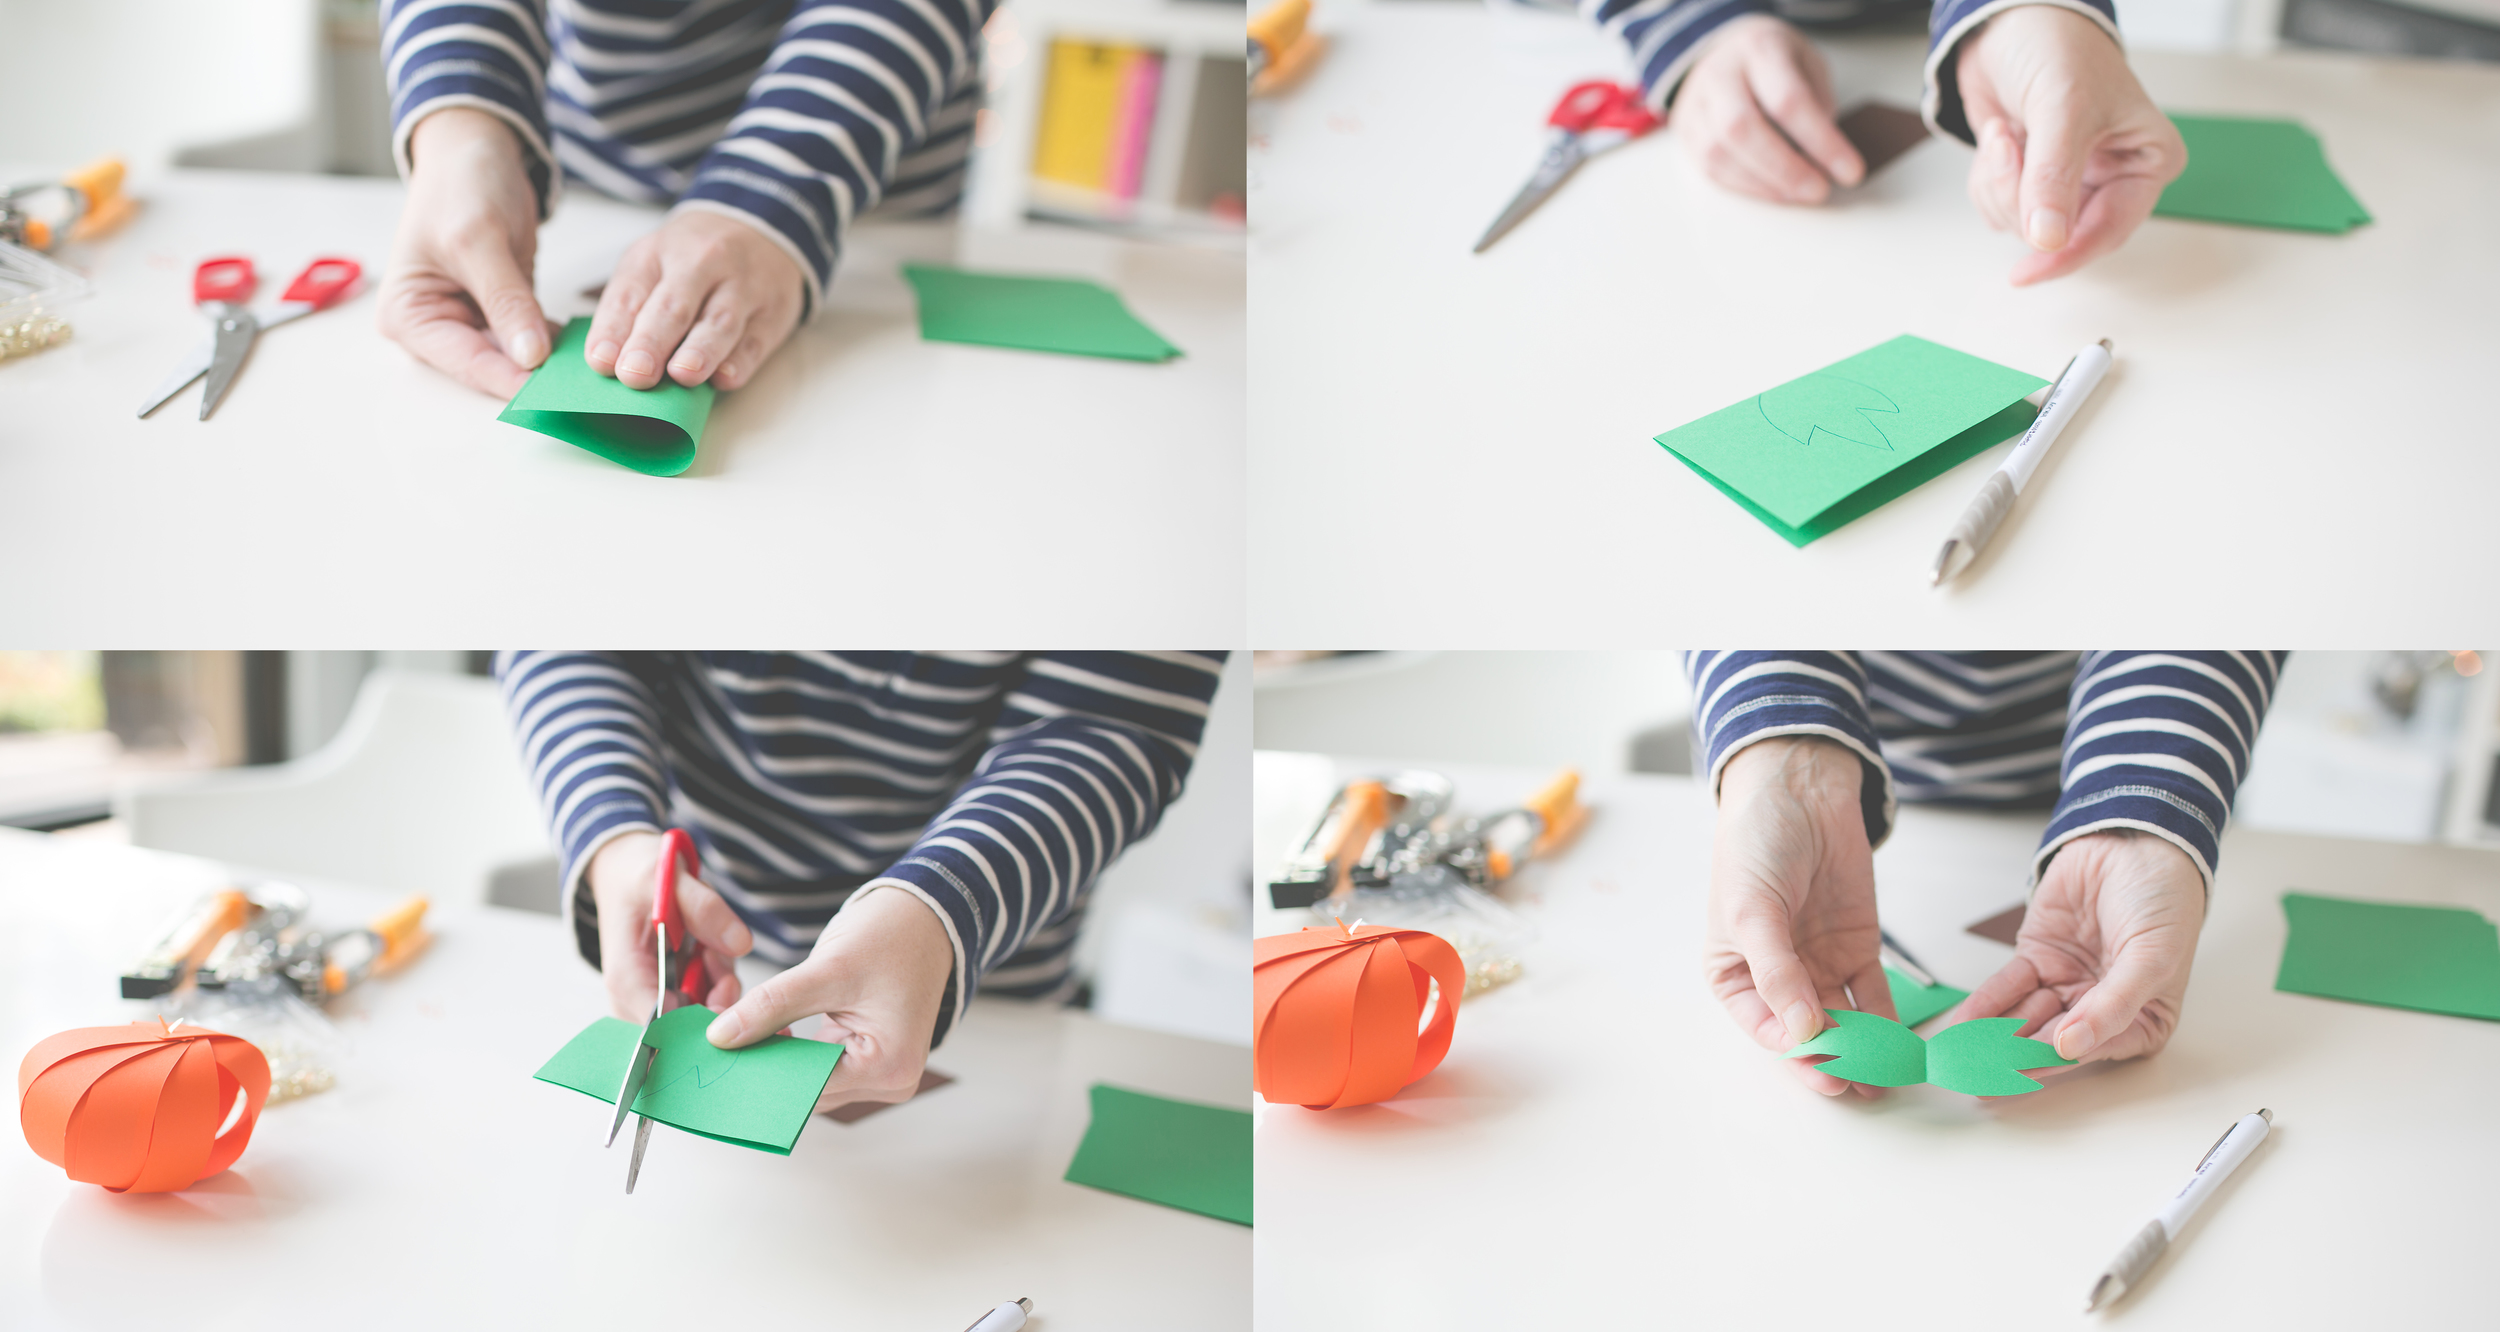
Take your leaf paper and fold in half. Cut a leaf shape out of one side. If you would like to draw it first, you may- but you can just freehand with the scissors if you are daring.
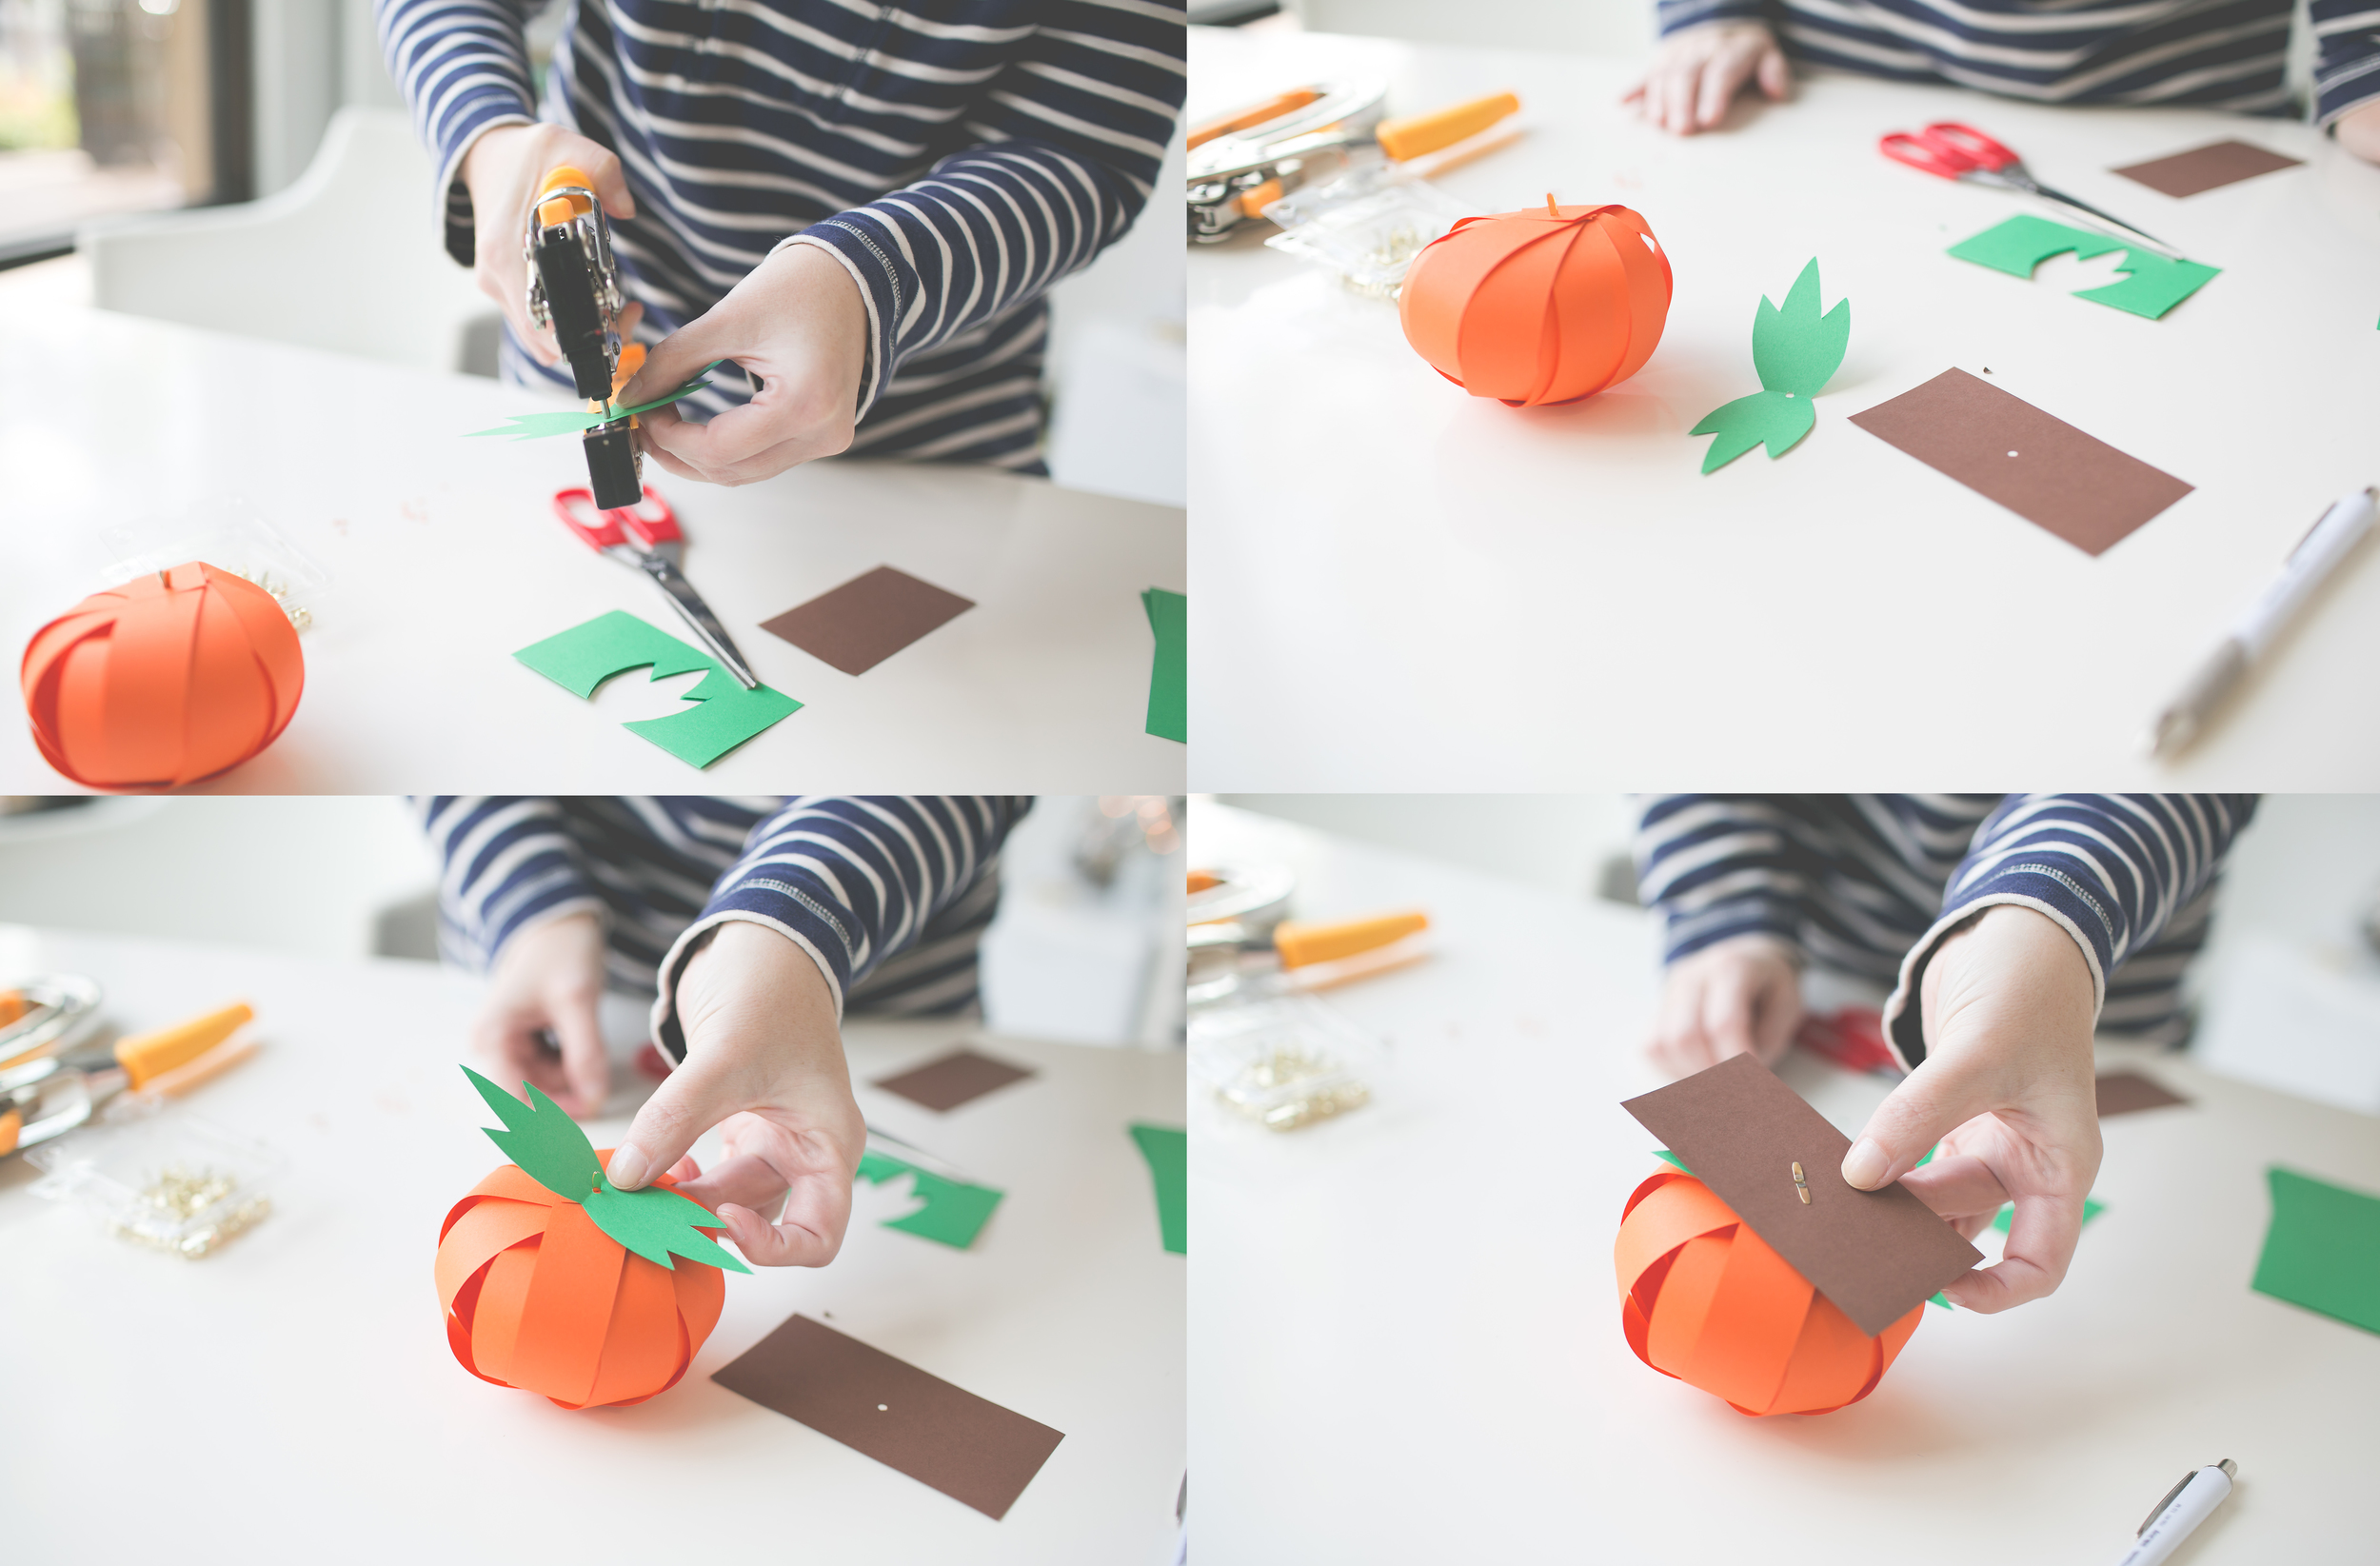
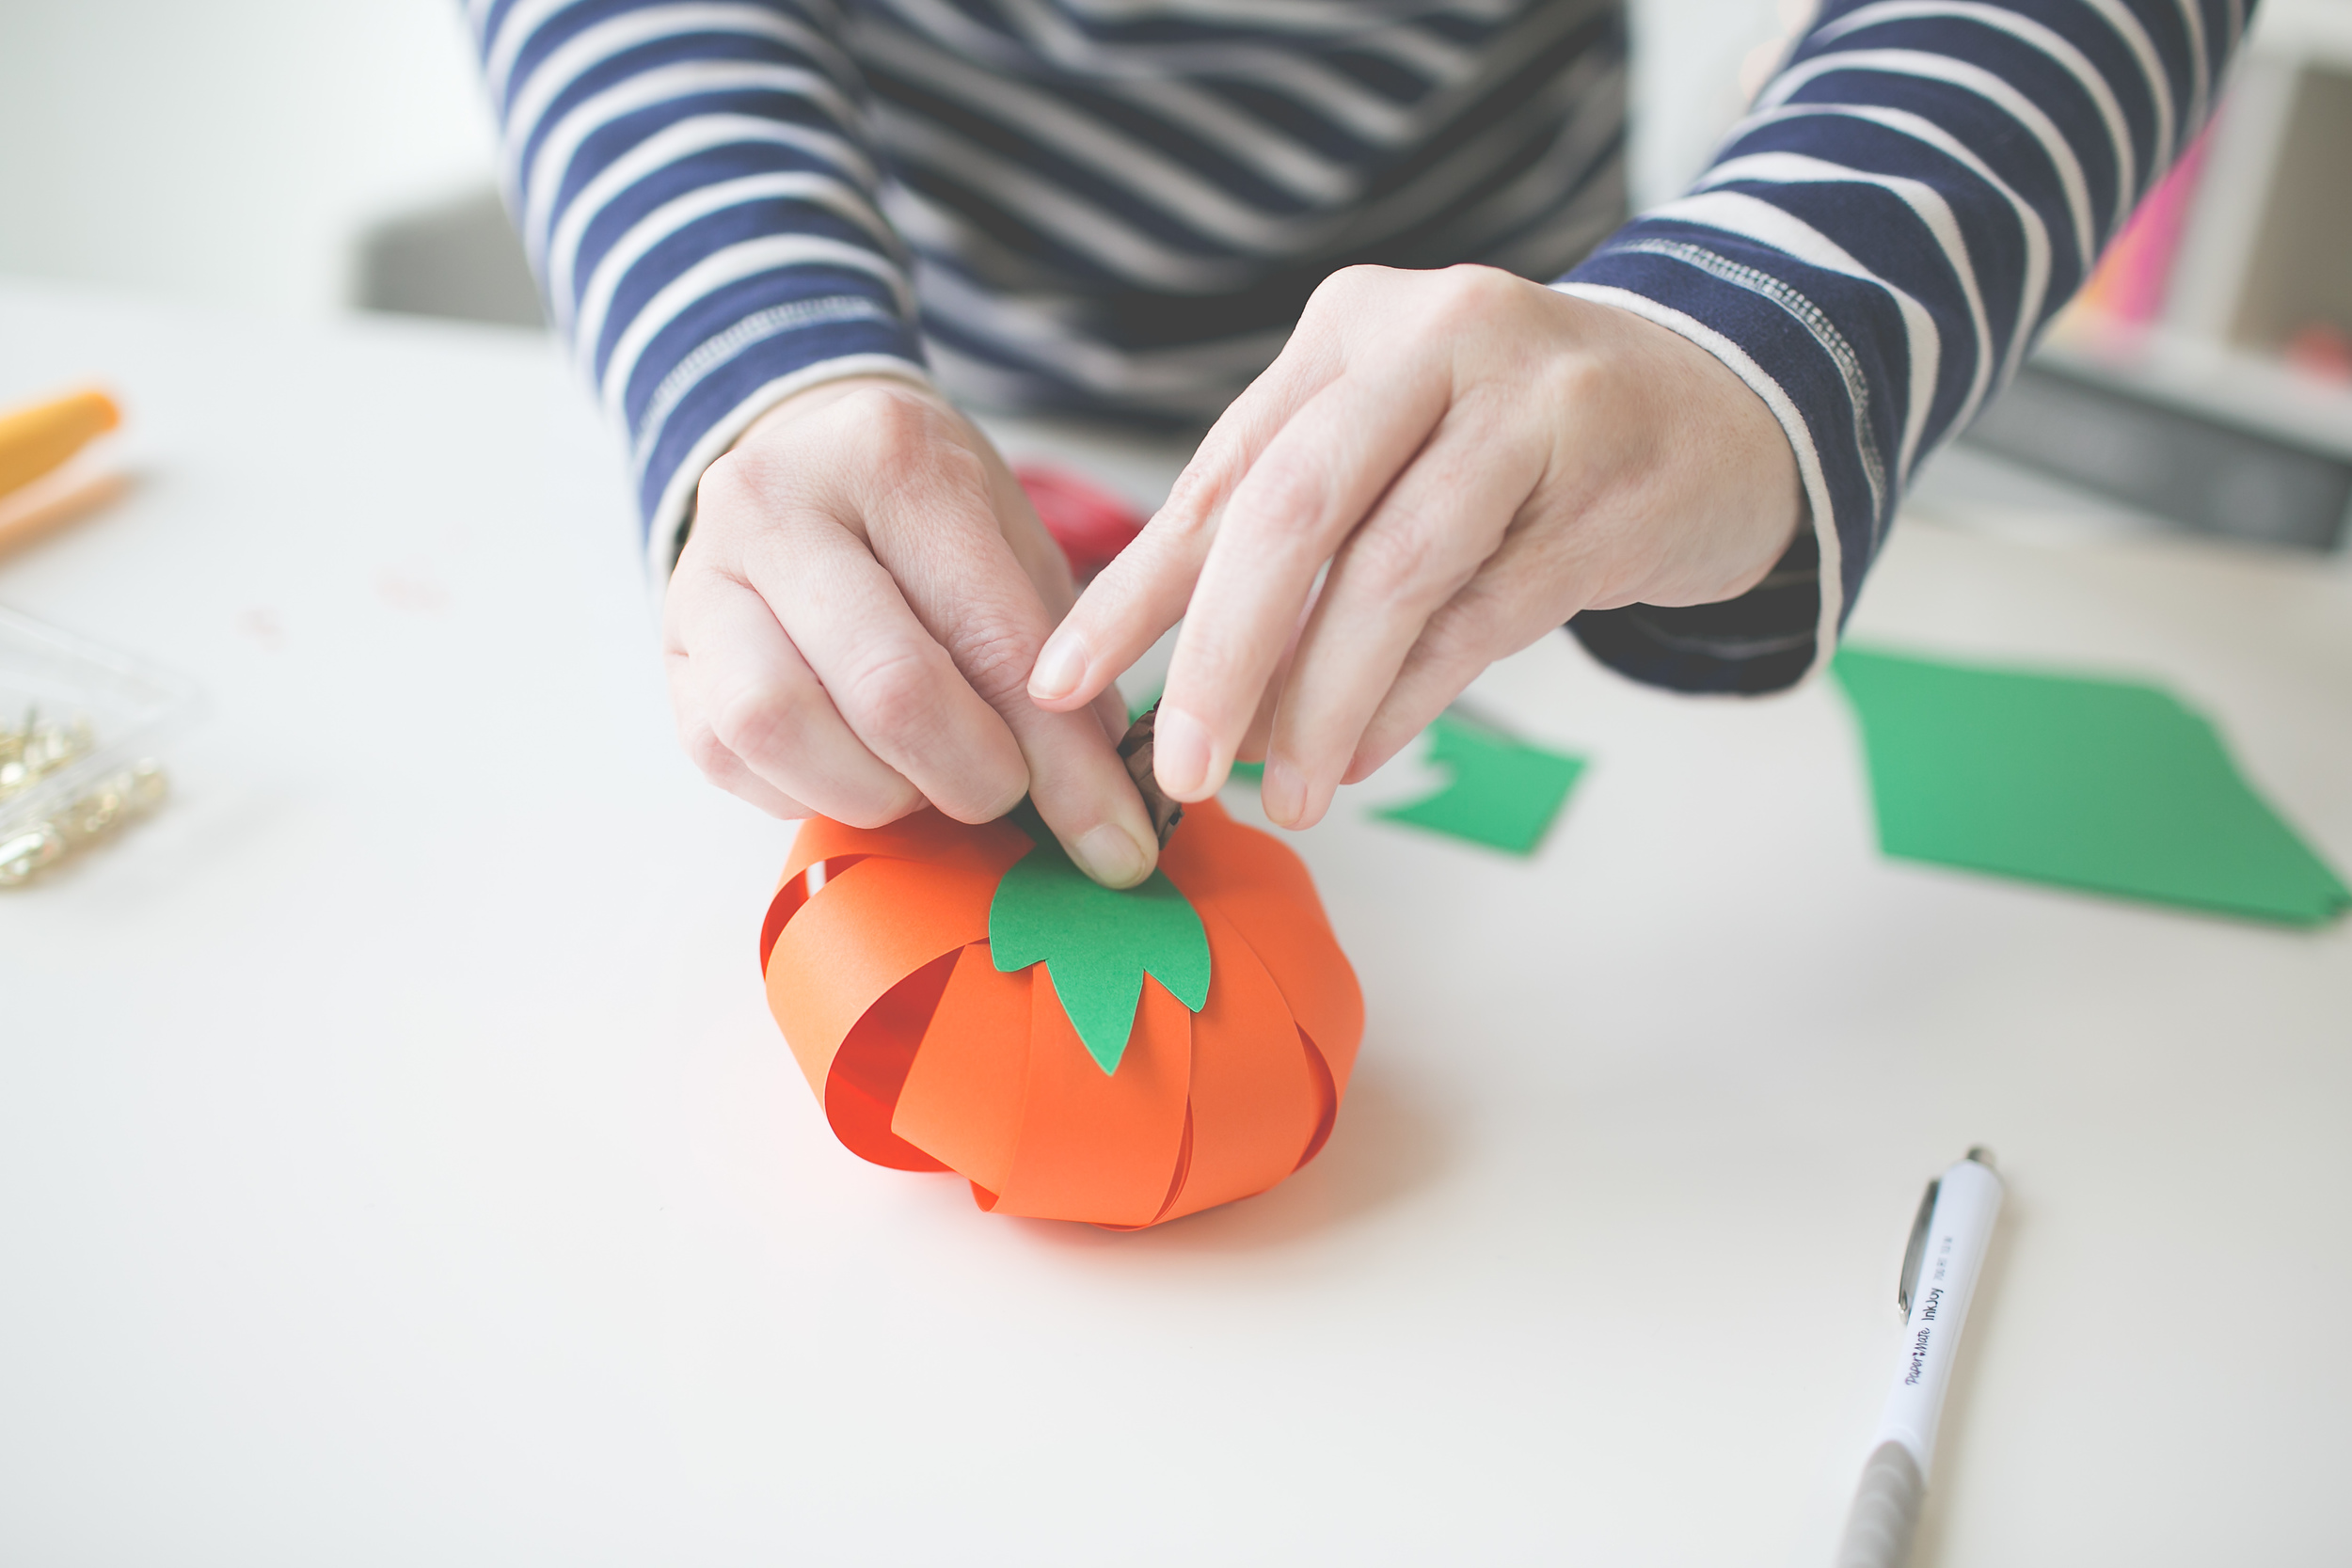
Open up your leaf shape and make sure you like the size with your pumpkin, feel free to trim down if you would like. Once you are ready, punch a hole in the center of the leaves and the center of your brown rectangle. Then you can open the brad at the top of your pumpkin and add the leaves and brown, then re-open the brad and tightly fasten.
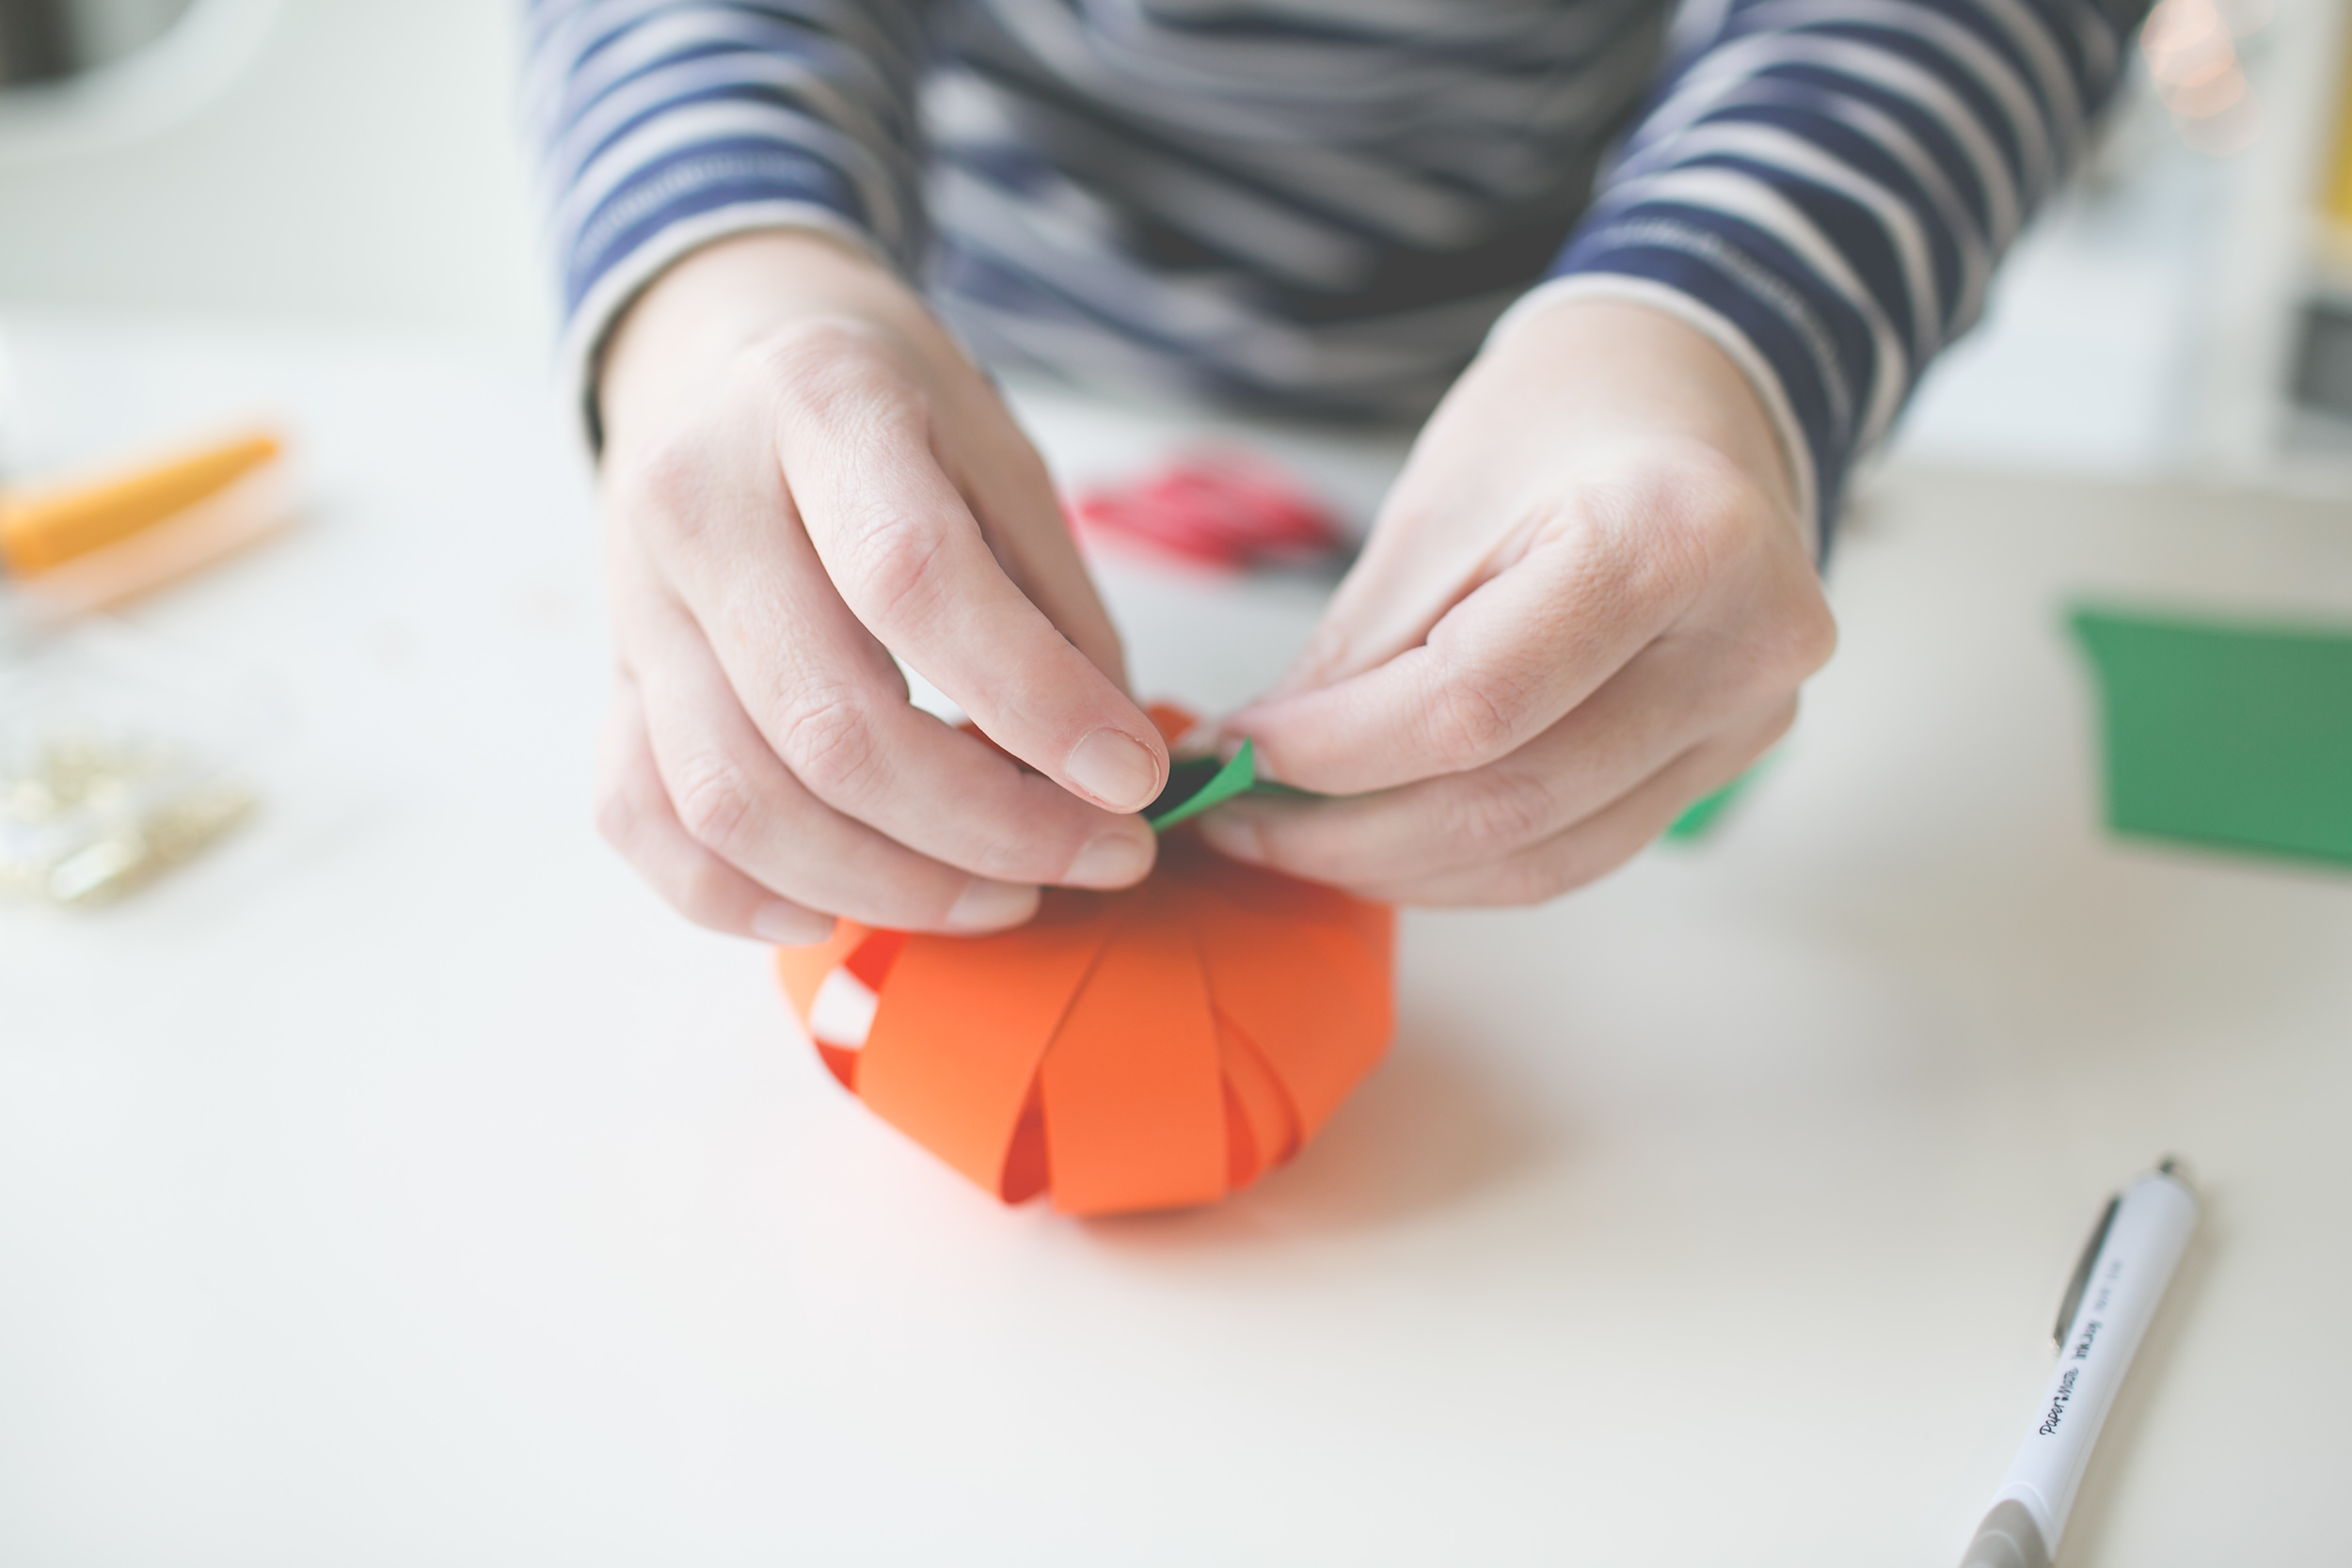
You can then start to scrunch and twist the brown paper into a stem. Be careful not to pull it off of the brad while you are doing this. But the more that you twist and manipulate the end upward- the more it looks like a stem.
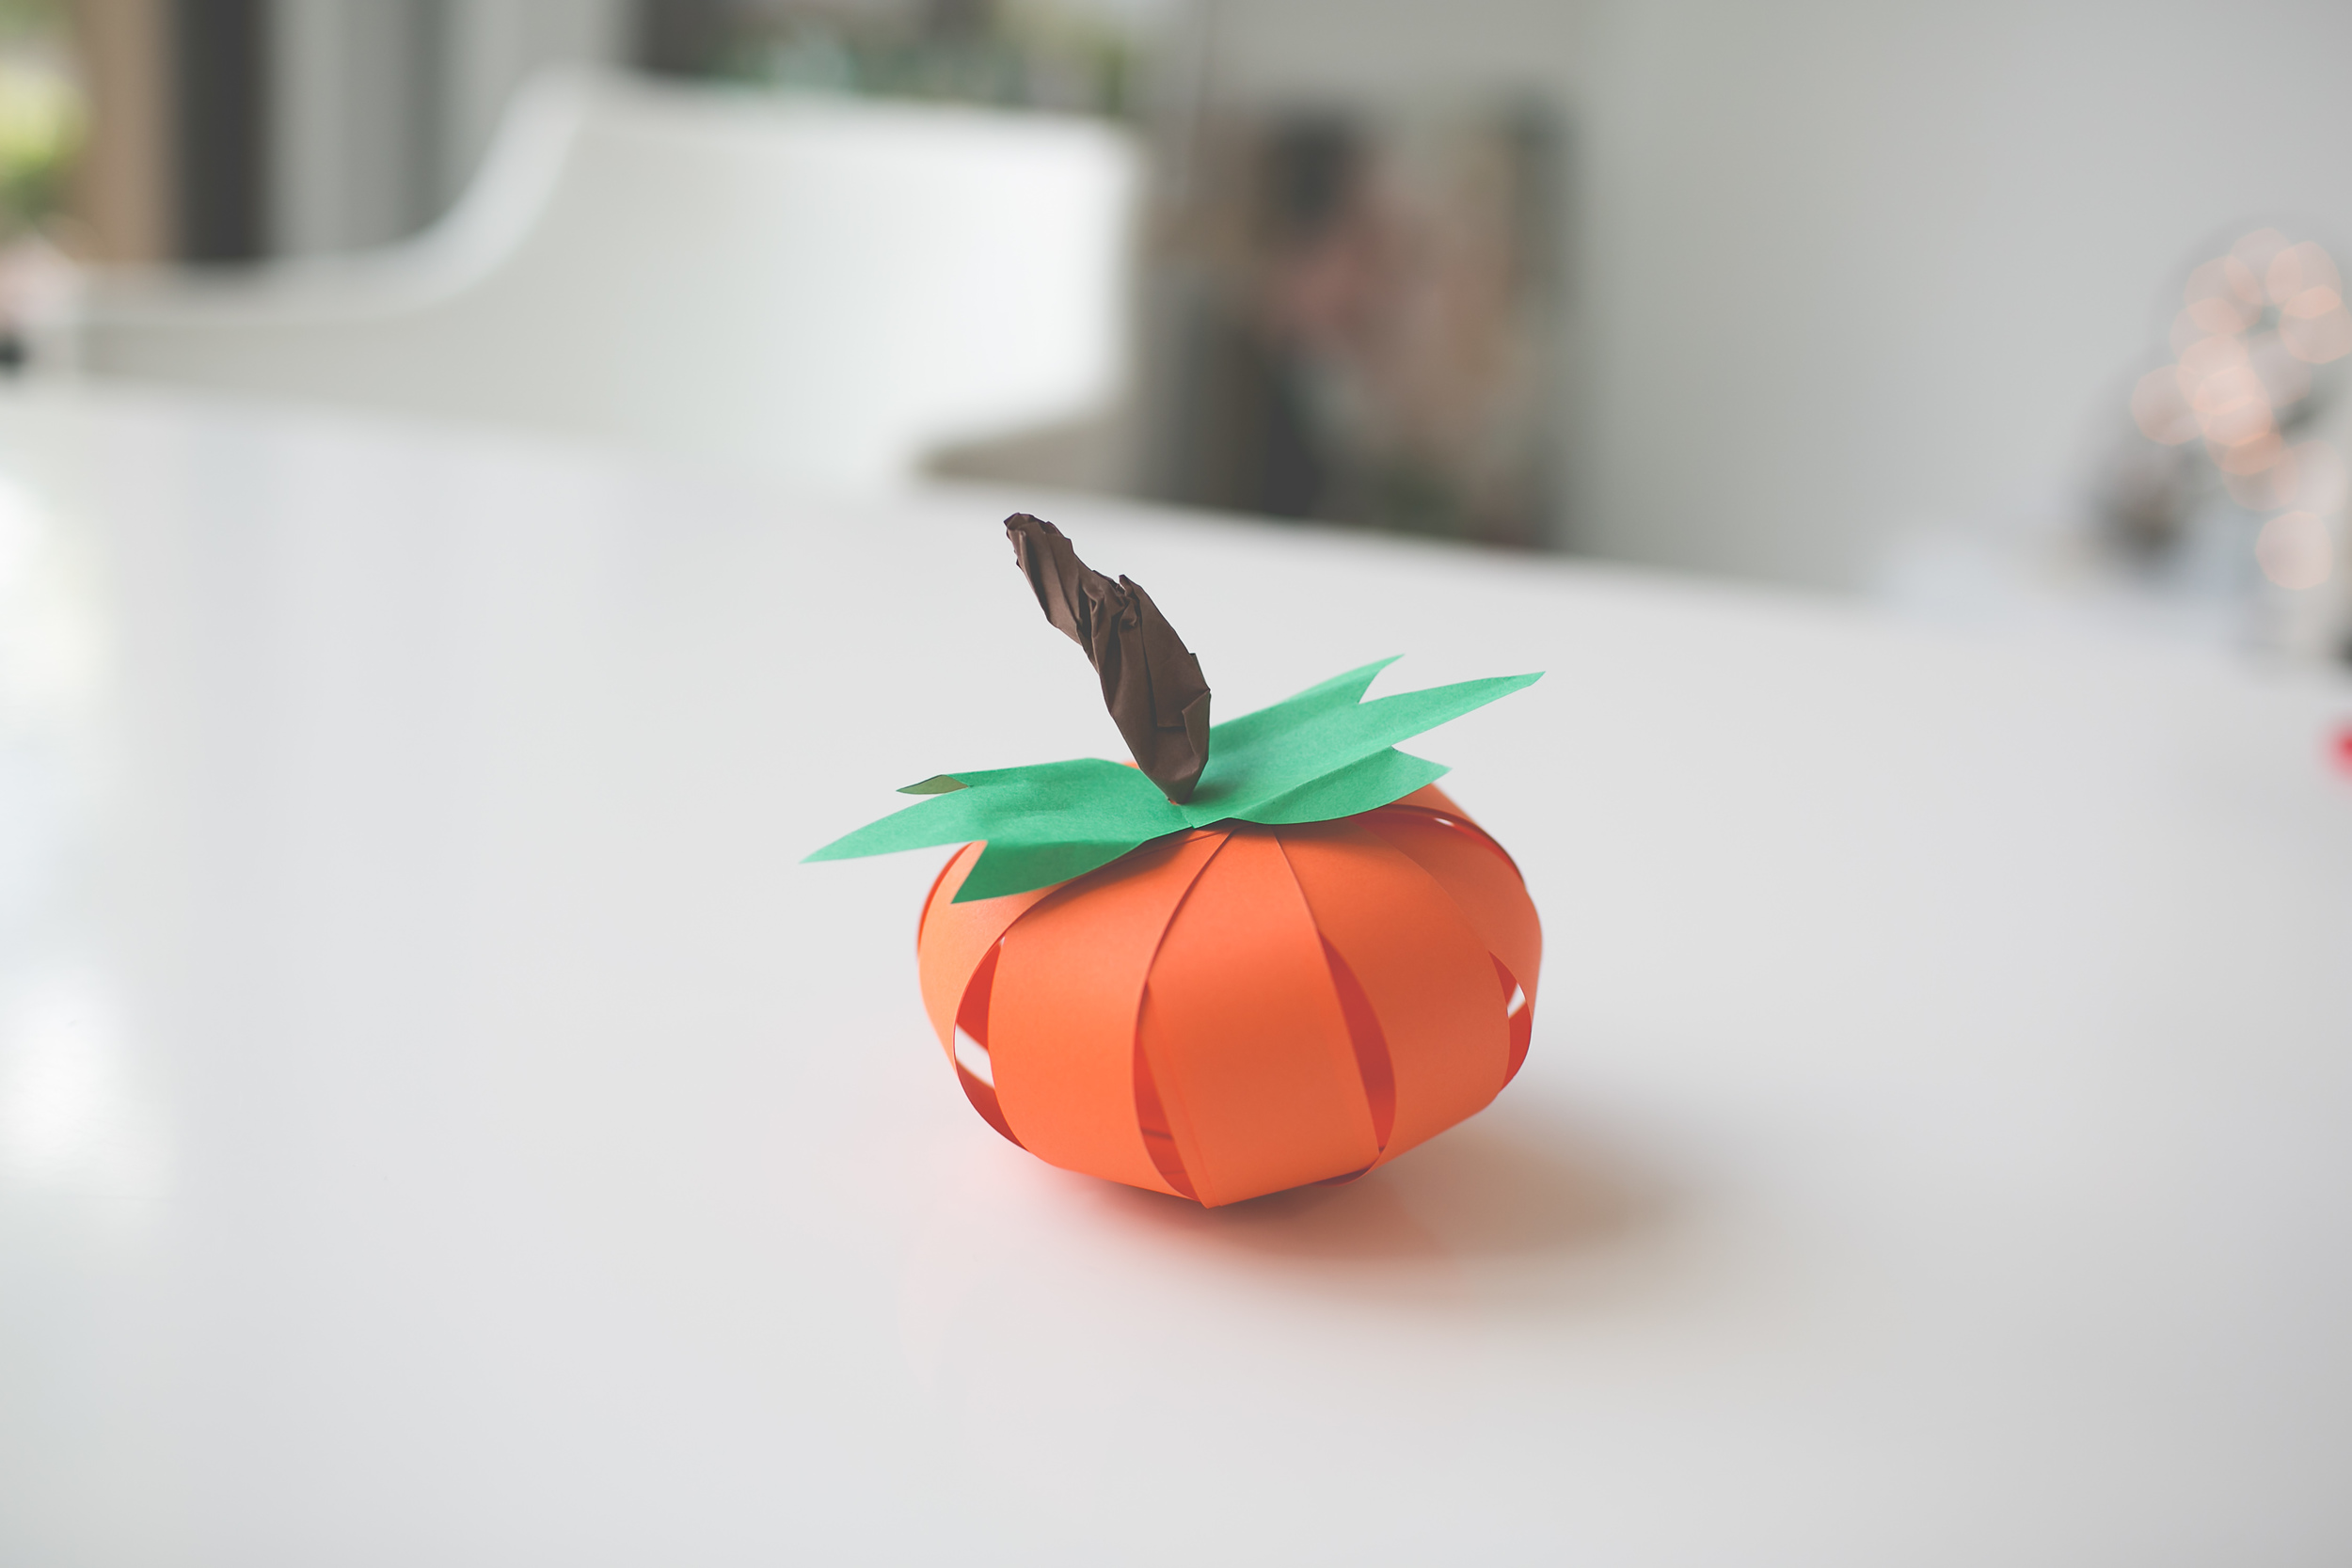
You are finished! Feel free to add finishing touches to your pumpkin- we crinkled our leaves a little bit. We would love to see how yours turned out- make sure to tag us: @paperieandpen #radpaperhowto
Hope you had fun!